By no measure, am I an expert on all the ins and outs of virtualization, hell, before I started looking into this stuff a “hypervisor” to me was just a really cool visor.

But after a reading a bunch of documentation, blog posts and StackExchange entries, I think I have enough of a basic understanding—or at least I have learnt enough to get it to work for my limited use case—to write some instructions.
The virtualization method I went with is Kernel-based Virtual Machine (KVM) which, to paraphrase Wikipedia, is a virtualization module in the Linux kernel that allows it to function as a hypervisor, i.e. it is able to create, run and manage virtual machines (emulated computer systems). 🤓
Creating a Virtualization Server with KVM
My home server runs Ubuntu and (among other things) I have set it up to use KVM and QEMU for virtualization, plus I have the libvirt toolset installed for managing virtual machines from the command line and to help with accessing virtual machines over my local network on my other Linux devices.
| Notes | |
|---|---|
| My Server OS | Ubuntu 18.04.2 |
| My Client OS | Fedora 29 |
| VM OS | whatever you prefer, for the example I’m using Fedora 29 |
For all of the following instructions, I am going to assume you are logged into your server (or whatever is going to be your virtualization hardware) and are in a terminal prompt (either directly or over ssh).
Part 0: Prerequisites
First, you have to see if your server’s processor supports hardware virtualization. You can do so by running the following command.
egrep -c '^flags.*(vmx|svm)' /proc/cpuinfo
This will check information on your CPU for the relevant extension support and return a number (based on the number of cores in your CPU). If it is greater than 0 your machine supports virtualization! 🎉 But if there is no result or 0, than it does not and there’s no point in continuing.
Part 1: Server Setup
Next, we have to install KVM, and the other required software for a virtualization environment. For an Ubuntu-based server do the following.
sudo apt install qemu-kvm libvirt-bin virtinst bridge-utils
Next, start and enable the virtualization service:
sudo systemctl enable libvirtd.service
sudo systemctl start libvirtd.service
It’s as simple as that. Now you can also use virsh from the libvirt toolset to see the status virtual machines:
virsh --list all
But you’ll likely not see any listed but rather something like:
Id    Name                           State
----------------------------------------------------
On to installation!
Part 2: Installing a Virtual Machine
I’m going to assume for this part that you have already downloaded a disk image of your desired operating system, that will be used for the virtual machine, and you know where it is on the server.
Deploying a virtual machine only requires one command: virt-install but it has several option flags that you’ll need to go through and adjust to your preference.
The following is an example using Fedora 29.
sudo virt-install \
--name Fedora-29 \
--ram=2048 \
--vcpus=2 \
--cpu host \
--disk path=/var/lib/libvirt/img/Fedora-29.qcow2,size=32,device=disk,bus=virtio,format=qcow2 \
--cdrom /var/lib/libvirt/boot/Fedora-Workstation-netinst-x86_64-29-1.2.iso \
--connect qemu:///system \
--os-type=linux \
--graphics spice \
--hvm --noautoconsole
From the above, the following are the bits you’ll need to edit to your preferences
| name | Name your virtual machine (VM) |
| ram | Assign an amount of memory (in MB) to be used by the VM |
| vcpus | Select a number of CPU cores to be assigned to the VM |
| disk | The disk image used by the virtual machine. You need only specify the name (i.e change Fedora-29 to something else) and update the size=32 to a desired capacity for the disk image (in GB). |
| cdrom | The path to the boot image that is to be used by the virtual machine. It need not be in /var/lib/libvirt/boot but the full path must be included here. |
The disk format (qcow2) and I/O bus and things aren’t things I’m gonna tinker with or know enough about, I’m just trusting other information I found.
Once you have the config flags set, and you have ran virt-install you will likely see an output similar the following.
WARNING  No operating system detected, VM performance may suffer. Specify an OS with --os-variant for optimal results.

Starting install...
Allocating 'Fedora-29.qcow2'
Domain installation still in progress. You can reconnect to the console to complete the installation process.
The “WARNING” is just that and nothing to worry about.
At this point your virtual machine should be up and running and ready for you to connect to it. You can check the status of your virtual machines by again running virsh --list all and you should see something like:
Id    Name                           State
----------------------------------------------------
 3     Fedora-29                      running
 -     Debian-9.7.0                   shut off
You can create as many virtual machines as your server can handle at this point, though I wouldn’t recommend running too many concurrently as there’s only so far you can stretch the sharing of hardware resources.
Part 3: Connecting to your Virtual Machine(s)
To connect to your virtual machine you’re going to use a tool called Virtual Machine Manager, there are a few other applications out there but this one worked the best/most consistently for me. You can likely install it on your system in the command line, using a package manager, as virt-manager.

Virtual Machine Manager can create and manage virtual machines just as we did in the command line on the server, but we’re going to use it on your computer as a client to connect to virtual machine(s) running remotely on your server.
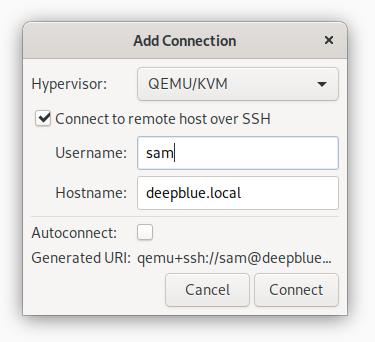
To add a connection, from the main window menubar, you’re going to go File > Add Connection..., which brings up the following dialog.

The hypervisor we are using is QEMU/KVM so that is fine as is, but in this dialog you will need to check Connect to remote host over SSH and enter your username and the hostname (or IP address) for your server, so it resembles the above, then hit “Connect”.
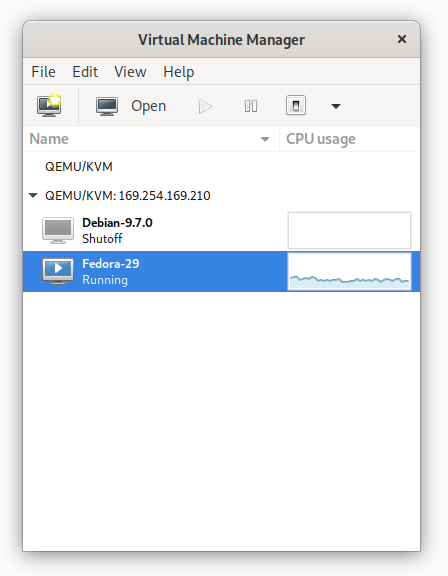
If all goes well, your server should appear in the main window with a list of VMs (see below for an example) and you can double-click to on any machines in the list to connect.

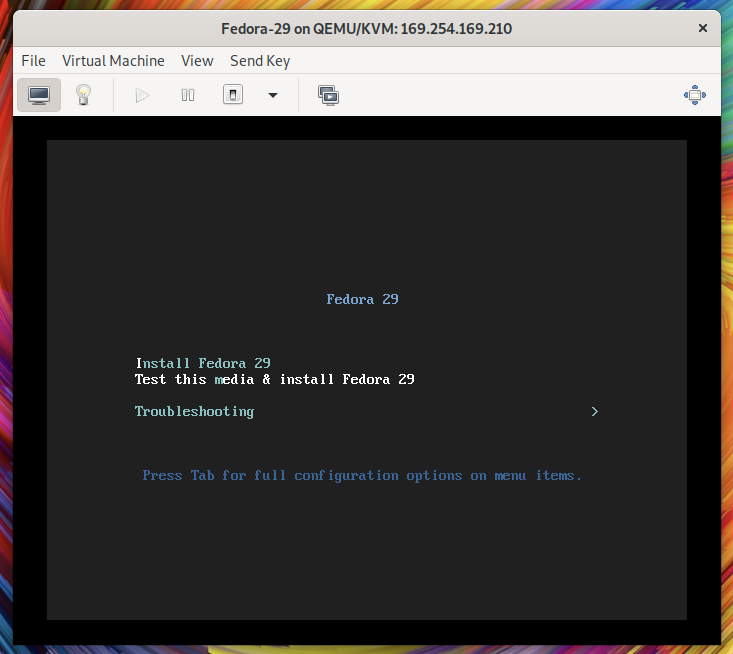
Doing so will launch a new window and from there you can carry on as if it were a regular computer and go through the operating system install process.

Closing this window or quitting the Virtual Machine Manager app will not stop the virtual machine as it will always be running on your server.
You can start and stop and even delete machines on your server using virt-manager on your computer, but it can also be done from the command line on your server with virsh, using some fairly straightforward commands:
# to suspend a machine
sudo virsh suspend Fedora-29
# to shutdown a machine
sudo virsh shutdown Fedora-29
# to resume a machine
sudo virsh resume Fedora-29
# to remove a machine
sudo virsh undefine Fedora-29
sudo virsh destroy Fedora-29
A Few Notes
Now unless you have astoundingly good Wi-Fi your best bet is to connect to your server over a wired connection—personally I have a direct connection via an ethernet cable between my server and another machine—otherwise (I found) there will be quite a bit of latency.